 Save
Save The first time I made kimchi, my entire apartment smelled like garlic for three days straight. My roommate walked in, stopped mid-stride, and asked if I'd started a Korean restaurant in our kitchen. I laughed, but honestly? That was the moment I understood why people obsess over making their own ferments. There's something deeply satisfying about transforming a humble head of cabbage into something that crackles with flavor and life.
Last winter, during that week when everyone seemed to be getting sick, I made a massive batch of kimchi. My friend Sarah came over, saw the jars lined up on my counter like science experiments, and looked skeptical. But after trying it straight from the jar with a spoon, she texted me three days later begging for the recipe. Something about that spicy, tangy kick just wakes up your whole palate.
Ingredients
- 1 large napa cabbage (about 1.2 kg / 2.5 lbs): The backbone of your kimchi—look for heads that feel heavy and have crisp, tightly packed leaves without any wilt or yellowing
- 1 medium daikon radish (about 200 g), julienned: Adds a subtle sweetness and satisfying crunch that balances the fierce heat of the spices
- 4 scallions, sliced: These bring a fresh, oniony bite that cuts through the richness of the fermented vegetables
- 1 medium carrot, julienned: Totally optional, but I love the way carrots add color and extra sweetness to the mix
- 80 g (1/3 cup) coarse sea salt: Don't use table salt here—the coarse texture draws out moisture more evenly, and sea salt has minerals that help fermentation
- 1.5 liters (about 6 cups) cold water: Creates the brine that transforms raw cabbage into something entirely new
- 6 cloves garlic, minced: More than you might think you need, but garlic mellows beautifully during fermentation
- 1 thumb-sized piece fresh ginger: Peeling and mincing this releases those zesty, warming oils that make kimchi sing
- 1 small onion, roughly chopped: Provides a sweet, aromatic base for the spice paste
- 3 tbsp fish sauce (or soy sauce for vegan): The secret ingredient that adds deep umami—trust me, you won't taste fish, just richness
- 1 tbsp sugar: Feeds the fermentation bacteria and balances the intense flavors
- 3–5 tbsp Korean red chili flakes (gochugaru), to taste: Start with 3 if you're heat-sensitive, but don't be shy—gochugaru has a fruity, complex heat that's different from regular chili flakes
- 2 tbsp rice flour: Creates a thickener for the spice paste so it clings to every single leaf
- 150 ml (2/3 cup) water: Mixes with the rice flour to form a glossy, spreadable paste
Tired of Takeout? 🥡
Get 10 meals you can make faster than delivery arrives. Seriously.
One email. No spam. Unsubscribe anytime.
Instructions
- Prep the cabbage:
- Cut the napa cabbage lengthwise into quarters, then chop into 2-inch pieces—think bite-sized, not dainty.
- Salt the cabbage:
- Dissolve sea salt in 1.5 liters cold water in a large non-reactive bowl. Add cabbage pieces, tossing to coat completely. Place a plate and a weight on top to keep everything submerged. Let sit for 2 hours, tossing every 30 minutes to ensure even salting.
- Rinse and drain:
- Rinse the salted cabbage thoroughly under cold water 2–3 times to remove excess salt. Drain well in a colander—really let it drip, or your kimchi will be too salty.
- Make the rice paste:
- Whisk rice flour with 150 ml water in a small saucepan over medium heat until thickened (about 1–2 minutes). Let cool completely, otherwise it'll cook the other ingredients when you blend them.
- Blend the spice paste:
- In a blender, combine cooled rice paste, garlic, ginger, onion, fish sauce (or soy sauce), and sugar. Blend until completely smooth. Stir in gochugaru to your desired spice level—the paste should be thick and vibrant red.
- Mix everything together:
- In a large bowl, combine drained cabbage, daikon radish, carrot (if using), and scallions. Add spice paste and, using kitchen gloves, massage thoroughly to coat all vegetables. Work those leaves like you mean it—every surface should be glossy with paste.
- Pack into jars:
- Pack the kimchi tightly into clean glass jars or a fermentation crock, pressing down firmly to eliminate air pockets. Leave at least 2.5 cm (1 inch) headspace at the top—fermentation creates gas, and you don't want explosions.
- Start fermenting:
- Seal and leave at room temperature out of direct sunlight for 1–2 days, burping the jars daily to release pressure. You'll see bubbles forming—that's the magic happening.
- Refrigerate:
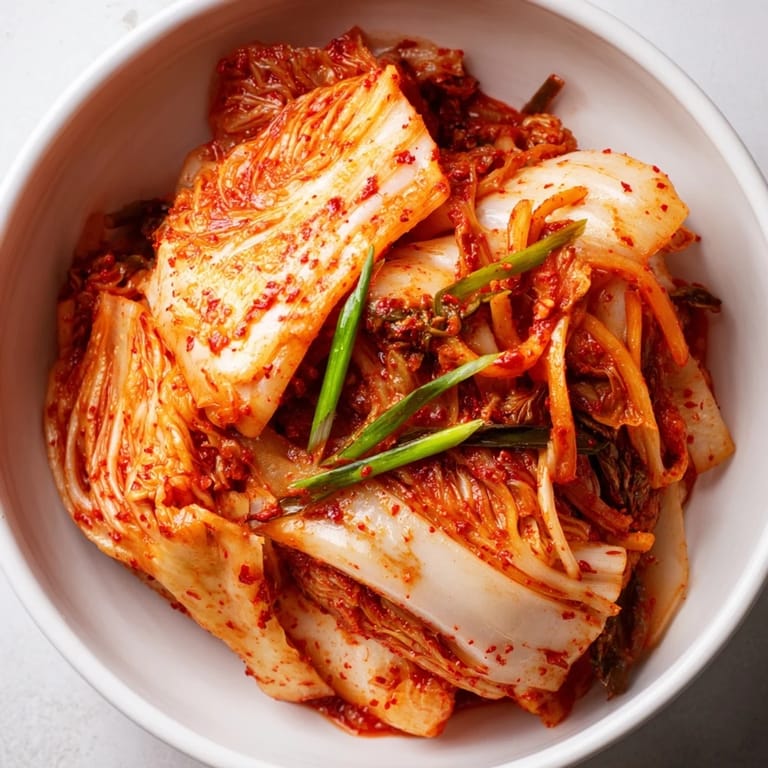
- Taste after 48 hours; once sour and tangy to your liking, move to the refrigerator. Kimchi will continue to ferment slowly and develop deeper flavors over several weeks, getting funkier and more complex over time.
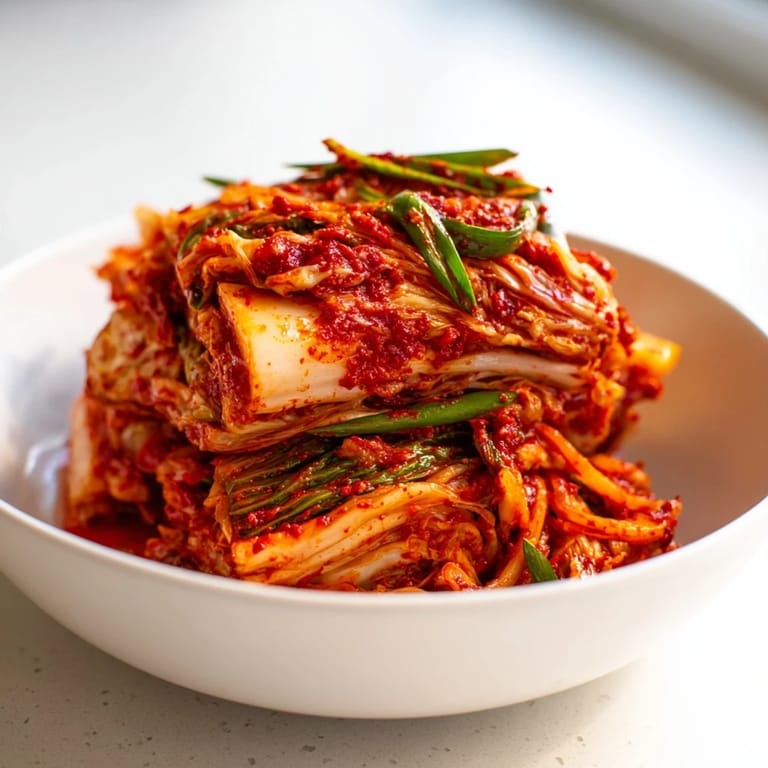
 Pin it
 My grandmother would have loved this. She was always making some kind of fermented vegetable in her kitchen, though she mostly stuck to pickles and sauerkraut. When I finally got the hang of kimchi and brought her a jar, she took one bite, eyes wide, and immediately asked if I could teach her the recipe. Passing kitchen wisdom backward felt strange but wonderful.
Getting the Spice Level Right
The first time I made kimchi, I went way overboard on the gochugaru because I thought I loved spicy food. Turns out, fermented chili heat is different from fresh chili heat—it blooms and intensifies over time. Start with less than you think you need, especially if you're new to kimchi. You can always add more spice to your next batch, but you can't tone it down once it's fermenting.
Understanding Fermentation Timeline
Temperature plays a huge role in how fast your kimchi ferments. In warm summer months, I've had kimchi ready in 24 hours, while in winter it might take 4–5 days to develop that tangy flavor I love. The best gauge isn't time—it's taste. Start checking after 48 hours and trust your palate over any rigid schedule.
Storage and Serving Ideas
Once refrigerated, kimchi keeps for months and actually continues to evolve. The first week is fresh and bright, while month-old kimchi develops that funky, complex flavor that kimchi enthusiasts crave. I keep two jars going—one fresh for eating straight, and one aged for cooking.
- Fried rice with leftover kimchi is never not a good idea, especially for breakfast
- Try tucking kimchi into grilled cheese sandwiches for an unexpected kick
- If your kimchi gets too sour, it's perfect for making kimchi jjigae (stew)
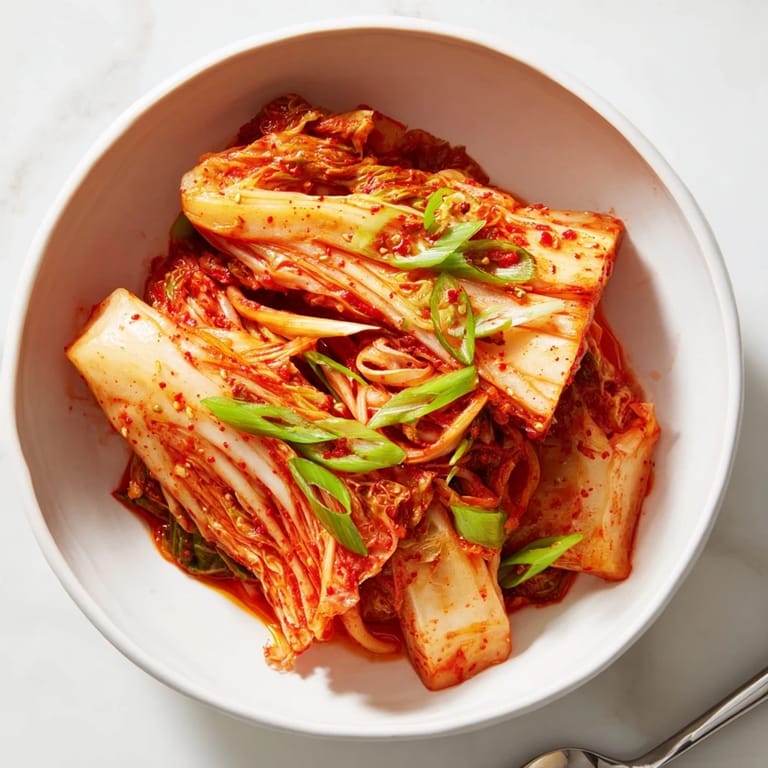
 Pin it
 There's something profoundly satisfying about opening a jar of kimchi you made yourself—the fizz, the funk, the knowledge that you coaxed life out of simple vegetables. Every batch teaches you something new, and that's the real joy of fermentation.
Frequently Asked Questions
- → How long does kimchi fermentation take?
Fermentation typically takes 1-2 days at room temperature to develop initial tanginess, though you can extend this up to a week for deeper sour flavors. Once refrigerated, kimchi continues fermenting slowly, developing more complex flavors over several weeks.
- → Can I make kimchi vegan?
Absolutely. Simply substitute fish sauce with soy sauce or a dedicated vegan fish sauce alternative. The fermentation process and final texture remain identical, with only subtle flavor differences.
- → How do I know when kimchi is ready to eat?
Begin tasting after 48 hours of room-temperature fermentation. When the kimchi reaches your desired balance of tanginess, sourness, and fizz, transfer it to the refrigerator. The perfect timing varies by personal preference and ambient temperature.
- → Why does my kimchi need rice flour?
The rice flour creates a thickened paste base that helps bind the spices and ensures even coating of the cabbage leaves. This traditional technique also provides carbohydrates that beneficial bacteria feed on during fermentation.
- → What can I serve kimchi with?
Kimchi shines alongside steamed rice, in fried rice dishes, tucked into savory pancakes, stirred into soups and stews, or simply as a bold side dish with grilled meats. It also pairs beautifully with eggs in breakfast scrambles.
- → Why do I need to burp the jars?
During fermentation, beneficial bacteria produce carbon dioxide as a byproduct. Burping releases this gas buildup, preventing dangerous pressure from accumulating inside sealed jars and reducing the risk of glass breakage or explosive leaks.