 Save
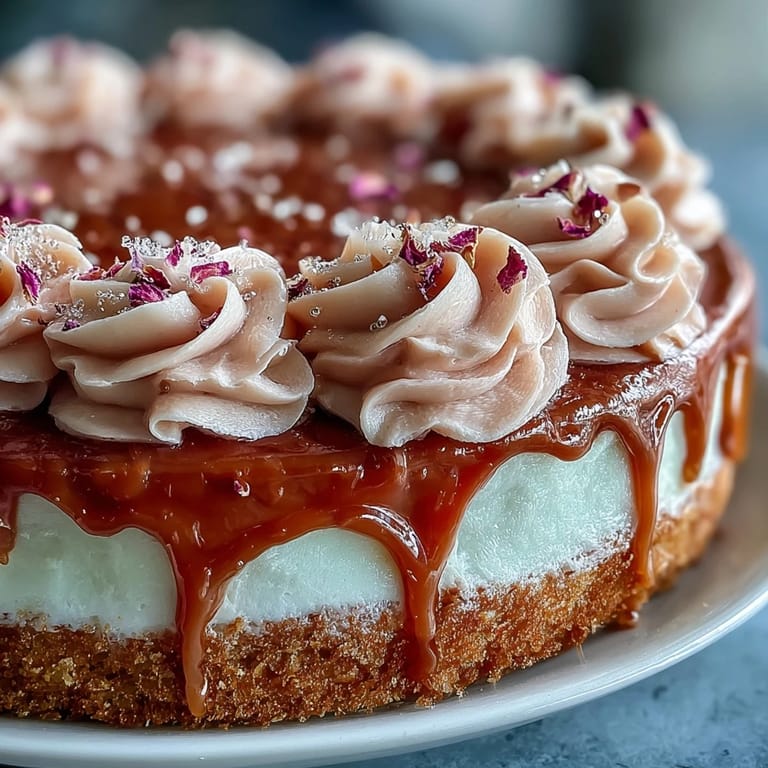
Save The first time I baked this rosé velvet cake, I was captivated by the swirl of blush pink batter gliding from the mixing bowl and the sparkling gold accents that followed. There was the quiet fizz of wine whispering into the frosting, and a gentle perfume that reminded me of fresh-cut roses set for a celebration. It’s not just the elegance of the cake, but the sense of occasion that lingers long after it’s been served. Even the sunlight in my kitchen seemed to glow a little brighter, reflecting off a thin brush of edible gold. Sometimes, beauty in food feels both engineered and effortless—and this cake is all about that balance.
I brought this cake to my friend’s bridal shower on a crisp spring afternoon, and her laughter as we dusted gold over the drips felt like another ingredient in the mix. We had ribbon-tied bouquets on the table and the sweet anticipation made even the most careful piping feel special. There were a few nervous hands as we lifted the cake, but once it took center stage, everyone wanted a turn photographing it. I’ll never forget the moment she grinned and said it looked too pretty to cut. That was the first of many group photos with this cake at celebratory gatherings.
Ingredients
- All-purpose flour: Gives the cake its classic crumb; always fluff and spoon it into the cup for lighter layers.
- Granulated sugar: Adds sweetness and moisture, and helps the pink color stay vibrant.
- Baking soda: Just the right leavening for a plush rise—make sure yours is fresh.
- Fine salt: Balances the sweetness so the rosé doesn't overpower.
- Cocoa powder: Unsweetened cocoa gives depth to the gentle pink, a little secret touch.
- Vegetable oil: Keeps the layers tender and soft for days.
- Large eggs: Room temperature eggs blend more easily for a velvety crumb.
- Buttermilk: The tang adds balance and helps create a delicate texture; don't skip it.
- Rosé wine: Opt for dry or sparkling to enhance both flavor and colour without excess sweetness.
- Vanilla extract: Grounds the cake with warmth and ensures it’s not one-note.
- White vinegar: The acid reacts with baking soda for extra lift—trust the science here.
- Pink or rose gel food coloring: A little goes a long way; start light and build to your perfect hue.
- Unsalted butter: For buttercream, use room temp so everything whips up true and fluffy.
- Powdered sugar: Sifted for cloudlike, silky buttercream that pipes and spreads like a dream.
- Heavy cream: Makes the chocolate glossy for the drip, just one splash at a time.
- White chocolate chips: The base for a smooth, decadent drip—melt gently and don’t rush.
- Gold luster dust: Only edible grades; creates the stunning gold without bitterness.
- Vodka or clear lemon extract: Helps the luster dust go on smoothly and evaporates as it sets.
Tired of Takeout? 🥡
Get 10 meals you can make faster than delivery arrives. Seriously.
One email. No spam. Unsubscribe anytime.
Instructions
- Prepare pans and preheat:
- Set your oven to 350°F and line three 8-inch pans with parchment—grease them well so your layers pop out easily.
- Sift the dry ingredients:
- In a large bowl, whisk flour, sugar, baking soda, salt, and cocoa until everything blends to a soft tan cloud.
- Mix the wet ingredients:
- With a gentle hand, combine oil, eggs, buttermilk, rosé, vanilla, and vinegar; it’ll look creamy and smell faintly floral.
- Combine and color:
- Swirl the wet mix into the dry and fold just until you see no streaks. Add the gel coloring patiently until you have that perfect plush rose hue.
- Bake the layers:
- Divide batter evenly and tap pans to release bubbles, then bake 30-35 minutes until the kitchen smells softly sweet and a skewer emerges clean.
- Cool completely:
- Let the cakes rest in their pans 10 minutes, then tip out and cool entirely on a rack so they’re ready for artful assembly.
- Make the buttercream:
- Beat butter until creamy, then slowly shower in powdered sugar; finish with rosé, vanilla, salt, and whip until luscious and airy.
- Assemble and coat:
- Trim cakes if domed, then stack and spread a swirl of buttercream between each. Coat the outside with a thin crumb layer and chill before giving your final flourishes.
- Gold drip magic:
- Melt white chocolate and cream until just smooth, let it cool, then gently pour around the cake edges for perfect drips. Once set, brush with shimmering edible gold paint and gasp a little at your handiwork.
- Decorate and serve:
- Finish with more gold dust, fresh petals, or berries for full celebration mode. Take a photo before everyone rushes in for a slice—it’s irresistible.
 Pin it
 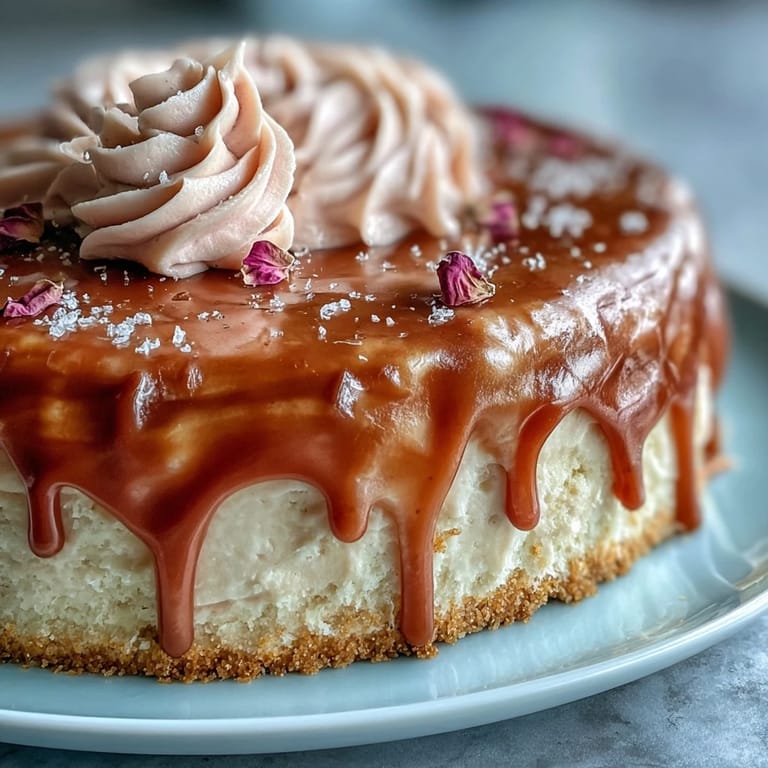 Pin it
 One slice was all it took for the future bride’s grandmother to ask for the recipe, her eyes twinkling as she tasted the delicate wine flavor under the creamy pink icing. We called it a ‘cake that makes people whisper’ as everyone quietly savored their bites before the cheers began again. It’s those hushed, happy moments that turn baking into a shared celebration.
Getting That Perfect Rose Pink
I once added too much gel coloring, and my cake came out the color of bubblegum rather than barely-blushing rose. The key is to use the tip of a toothpick and build up slowly, pausing with each mix to check the hue in daylight. Sometimes, the batter darkens a little as it bakes, so err just a click lighter than you want for the finished look. The color shows through translucent parchment, so peek before pouring into the pans, and always trust your instinct more than the bottle.
Mastering the Edible Gold Drip
Paiting with gold luster dust feels like a moment of real artistry—but it took a few tries before my drips looked dreamy instead of drizzly. The trick is to wait until the white chocolate is truly cool and set so the paint glides on smooth, not runny. I keep a separate paintbrush just for this, washed and dried between each use. Little extras like this make dessert feel like a craft project, with the bonus that you get to eat it when you’re done.
Make-Ahead, Dietary Swaps, and Last Touches
Baking this cake a day in advance often deepens the flavor and calms event-day nerves. I’ve also swapped in gluten-free flour and dairy alternatives with success—just double-check each label, especially for white chocolate. Finishing touches like berries, rosebuds, or even gold-dusted leaves never go unnoticed.
- Bring the cake to room temperature before serving for the smoothest buttercream texture.
- Store leftovers in the refrigerator, loosely covered, to keep the crumb fresh.
- Never rush the cooling process—patience makes perfect layers every time.
 Pin it
  Pin it
 This cake turns a gathering into a golden memory, and any leftover crumbs are cherished long after the bouquet toss. Enjoy each bite, and may your kitchen shine as brightly as this cake does on the table.
Frequently Asked Questions
- → Can I use sparkling or dry rosé?
Both work; a dry rosé will add subtle acidity while a sparkling rosé gives a lighter, fruitier lift. Taste the wine first and adjust the amount in buttercream to avoid overpowering the balance.
- → How do I achieve a stable buttercream?
Beat room-temperature butter until light, add sifted powdered sugar gradually, then incorporate rosé a tablespoon at a time. Chill briefly if too soft and add more sugar to thicken rather than extra liquid to avoid runniness.
- → What ensures clean gold drip lines?
Keep the white-chocolate drip warm but not hot; test the consistency on the edge of a chilled bowl. Pour slowly from the center edge, letting gravity form drops, then paint with edible gold once the drip has set but is still tacky for adhesion.
- → Can the layers be made ahead and stored?
Yes. Wrap cooled layers tightly and refrigerate up to 24 hours or freeze for longer. If chilled, bring layers to room temperature before assembling to prevent buttercream from softening unevenly.
- → What can I use instead of white chocolate for the drip?
Good alternatives include melting high-quality candy coating or tempered couverture white chocolate. Adjust cream volume to match viscosity; avoid low-quality mixes that separate when cooled.
- → How do I prevent a collapsed or leaning stack?
Level each layer, apply a thin crumb coat and chill to firm up. Use a final chilled layer before adding a heavy drip. For very tall builds, insert dowels for internal support and a cake board between tiers if needed.