 Save
Save I was craving brownies but had run out of all-purpose flour, so I grabbed the bag of sweet rice flour I'd bought for dumplings and decided to experiment. What came out of the oven wasn't a brownie at all—it was chewy, glossy, and almost custard-like in the center. My roommate walked in, tasted a square still warm from the pan, and said it reminded her of the mochi cakes her grandmother used to make. That's when I realized I'd stumbled onto something special.
I brought this to a potluck once, sliced into neat squares and dusted lightly with powdered sugar. A friend who usually skips dessert came back three times, each time pretending she was getting it for someone else. By the end of the night, she asked for the recipe, and I watched her take a photo of every step I described on a napkin.
Ingredients
- Sweet rice flour (mochiko): This is the heart of the chew—don't use regular rice flour or it won't have that signature mochi bounce.
- Granulated sugar: Just enough to sweeten without overpowering the nutty peanut butter, and it helps create that shiny, golden top.
- Baking powder: A little lift keeps it from being too dense, though it stays beautifully compact.
- Salt: Brings out the sweetness and balances the richness of the butter and peanut butter.
- Whole milk & coconut milk: The combination makes the batter silky and adds subtle tropical warmth that plays well with peanut butter.
- Eggs: They bind everything together and give the cake structure while keeping it tender.
- Creamy peanut butter: Use a good quality one that's smooth and not too oily—it's the star flavor here.
- Unsalted butter: Adds richness and helps the edges crisp up just a little.
- Vanilla extract: A quiet note that rounds out all the other flavors.
Tired of Takeout? 🥡
Get 10 meals you can make faster than delivery arrives. Seriously.
One email. No spam. Unsubscribe anytime.
Instructions
- Prep your pan:
- Preheat the oven to 350°F and grease your 9x13-inch pan generously, or line it with parchment so the squares lift out clean. I learned the hard way that skipping this step means wrestling with a spatula later.
- Mix the dry ingredients:
- Whisk together the sweet rice flour, sugar, baking powder, and salt in a large bowl until there are no lumps. It should look light and evenly combined.
- Blend the wet ingredients:
- In another bowl, whisk the milk, coconut milk, eggs, peanut butter, melted butter, and vanilla until completely smooth. The peanut butter can be stubborn, so whisk with purpose until no streaks remain.
- Combine and pour:
- Pour the wet mixture into the dry and whisk gently until the batter is smooth and glossy. Pour it into your prepared pan and tap the pan on the counter a few times to release any trapped air bubbles.
- Bake until golden:
- Slide the pan into the oven and bake for 45 to 50 minutes, until the top turns golden brown and a toothpick poked in the center comes out clean. The edges will pull away slightly from the pan.
- Cool completely:
- Let the cake cool fully in the pan before slicing. It firms up as it cools, and cutting it warm will give you a sticky mess instead of clean squares.
 Pin it
 My nephew, who claimed he didn't like anything "weird," ate two pieces standing at the counter after school one day. He didn't say much, just nodded and asked if I could make it again next week. That quiet approval meant more than any compliment.
Customizing Your Mochi Cake
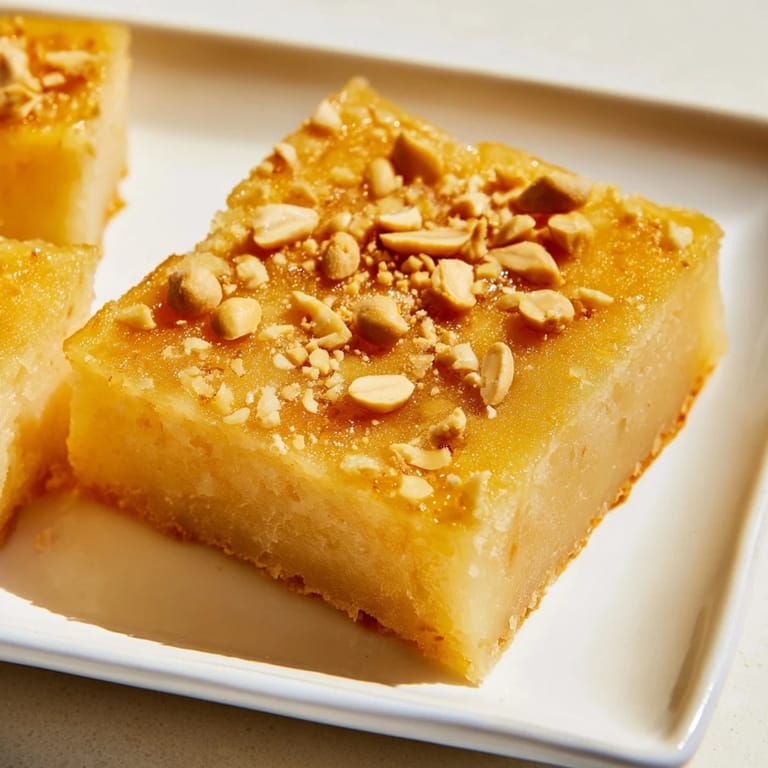
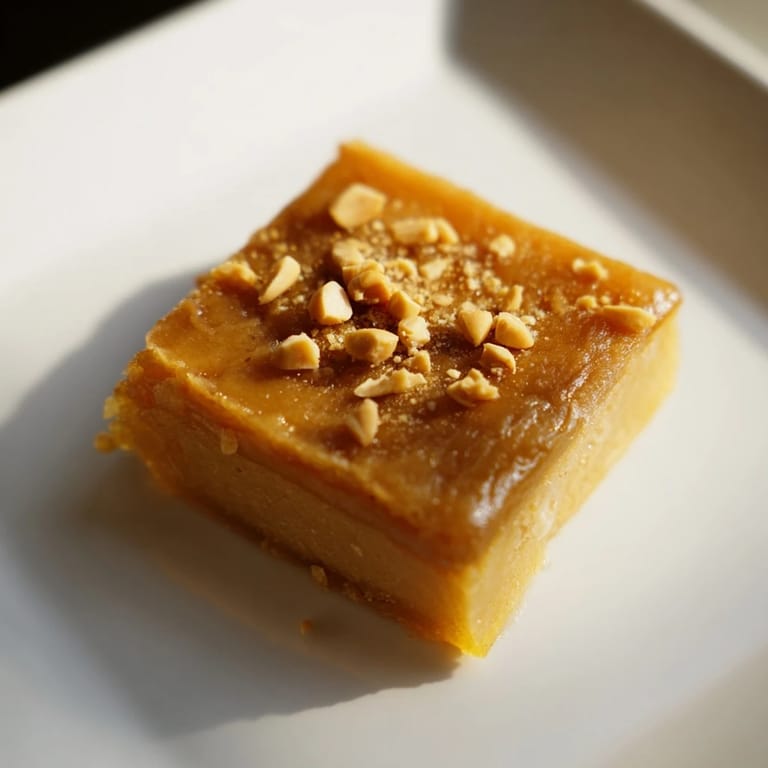
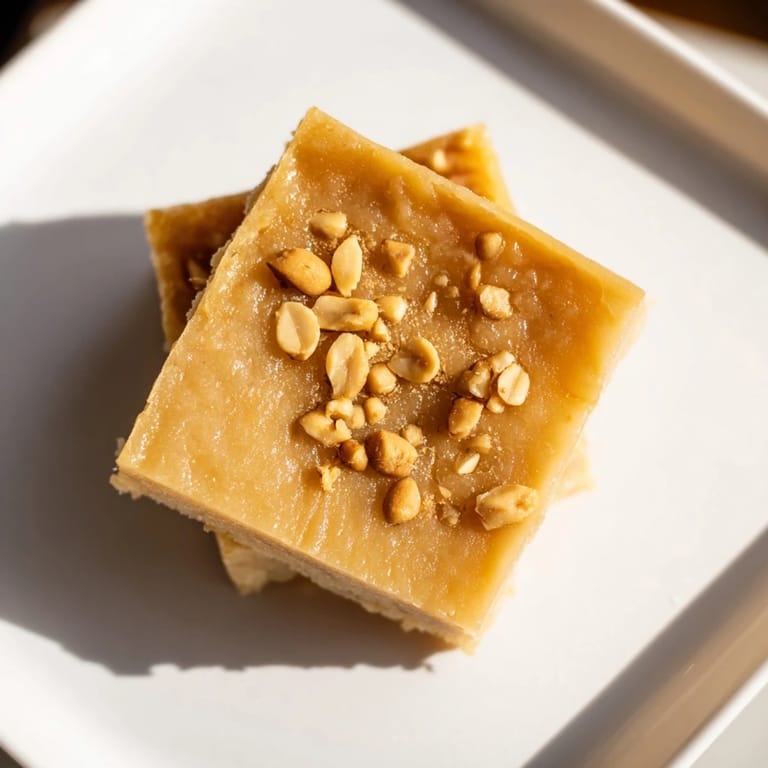
If you want a little crunch, scatter roasted peanuts over the top before baking—they toast further in the oven and add texture. You can also swap the coconut milk for evaporated milk if you prefer a lighter, less tropical flavor. I've tried both, and each version has its own charm depending on the mood.
Serving and Storing
This cake is wonderful at room temperature, but I actually prefer it cold from the fridge—the texture gets even chewier and more fudge-like. It keeps well in an airtight container for up to five days, though it rarely lasts that long. A dollop of whipped cream or a few slices of fresh strawberries on the side makes it feel fancy without any extra effort.
What Makes This Different
Traditional butter mochi is already beloved for its chewy texture, but adding peanut butter gives it a deeper, almost savory-sweet complexity that feels both familiar and surprising. It's gluten-free by nature, not by substitution, which means the texture is exactly what it should be—not a compromise. This is one of those recipes that doesn't need much explanation once someone tastes it.
- If your peanut butter is very thick, warm it slightly before whisking it in.
- The batter should pour easily but not be watery—it should coat the back of a spoon.
- Let the cake rest for at least 30 minutes after cooling for the cleanest slices.
 Pin it
 This cake has become my go-to when I want something sweet but not too fussy, something that feels like a hug in dessert form. I hope it finds a place in your kitchen the way it has in mine.
Frequently Asked Questions
- → What flour is used for the chewy texture?
Sweet rice flour, also called mochiko or glutinous rice flour, creates the signature chewy texture in this cake.
- → Can I substitute the coconut milk?
Yes, evaporated milk can be used for a lighter flavor, but coconut milk adds richness and depth.
- → How do I know when the cake is done baking?
The cake is ready when the top turns golden brown and a toothpick inserted into the center comes out clean.
- → Are there options for added texture or crunch?
Sprinkling roasted peanuts on top before baking adds a delightful nutty crunch to complement the soft cake.
- → Is this suitable for gluten-free diets?
Yes, using glutinous rice flour ensures the cake is gluten-free, but always verify ingredient labels for cross-contamination.