 Save
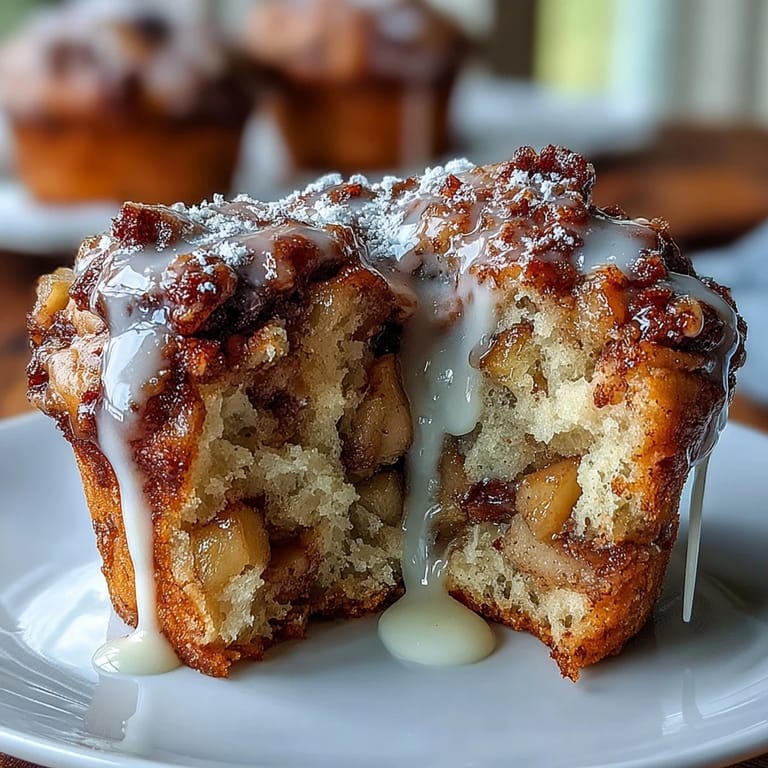
Save There's something about the smell of cinnamon and baked apples that takes me straight back to my aunt's kitchen on a Saturday morning—she'd pull these golden muffins from the oven and immediately drizzle them with glaze while they were still warm enough for it to pool and run down the sides. I've since learned that apple fritter muffins are basically the best of both worlds: the tender crumb of a proper muffin with that crispy-sweet finish of a fried fritter, minus the oil splatters. The first time I made them myself, I was nervous about overmixing the batter, but the moment I folded in those apple chunks and caught that spiced aroma, I knew they'd turn out right.
I made these for my coworkers once during a period when I was trying to be that person who brings homemade treats, and someone asked if I'd bought them from a bakery—which was both hilarious and the exact compliment I needed that week. The way those muffins disappeared from the break room told me everything I needed to know about whether the recipe was worth keeping around.
Ingredients
- Apples (2 large, peeled, cored, and diced): Granny Smith brings tartness to balance the sweetness, while Honeycrisp adds natural honey notes—pick whichever you have or split the difference with both.
- All-purpose flour (2 cups): Standard flour keeps these approachable; don't fuss with alternatives unless you know what you're doing.
- Brown sugar (3/4 cup, packed): The molasses gives these muffins their deep caramel undertone and keeps them moist longer than white sugar ever could.
- Baking powder (2 teaspoons): This is your lift; stale baking powder is the silent killer of muffins, so check the date on yours.
- Ground cinnamon (1 1/2 teaspoons): Don't skimp here—this is the spice that makes people close their eyes when they bite in.
- Salt (1/2 teaspoon): A tiny amount that makes the cinnamon taste even more like itself.
- Eggs (2 large): These bind everything and give structure; room temperature eggs mix in smoother than cold ones.
- Milk (1/2 cup plus 1–2 tablespoons for glaze): Use whatever milk you have—dairy, almond, oat—they all work.
- Unsalted butter (1/4 cup, melted): Melted butter incorporates easier than softened and keeps the batter tender.
- Vanilla extract (1 teaspoon): A single teaspoon does more for flavor depth than you'd expect.
- Powdered sugar (2 tablespoons): For the glaze; sift it if you want it silky, or just whisk vigorously if you're impatient like me.
Tired of Takeout? 🥡
Get 10 meals you can make faster than delivery arrives. Seriously.
One email. No spam. Unsubscribe anytime.
Instructions
- Set your oven and tin:
- Preheat to 350°F (175°C) and grease your 12-cup muffin tin with butter or line it with paper liners so your muffins don't stick. Paper liners make cleanup easier, but greasing gives you a prettier exterior.
- Combine the dry ingredients:
- In a large bowl, whisk together the flour, brown sugar, baking powder, cinnamon, and salt until everything is evenly distributed and there are no brown sugar lumps hiding anywhere. This is the moment where the kitchen smells like potential.
- Mix the wet ingredients:
- In a separate bowl, whisk the eggs, milk, melted butter, and vanilla extract until they're completely combined and look like a smooth, homogeneous mixture. This takes about a minute of whisking.
- Bring it together gently:
- Pour the wet ingredients into the dry bowl and fold them together with a rubber spatula using as few strokes as possible—the batter should look shaggy and rough, not smooth. Overmixing is the one real mistake you can make here.
- Fold in the apples:
- Add your diced apples and fold them in gently until they're scattered throughout the batter without breaking them into mush. A few larger chunks are better than apple pulp.
- Fill the muffin cups:
- Divide the batter evenly among the cups, filling each about two-thirds full so they have room to rise without spilling over. A small ice cream scoop makes this less messy than a spoon.
- Bake until golden:
- Bake for 20–25 minutes until the tops are golden brown and a toothpick inserted into the center comes out clean or with just a few moist crumbs. They'll smell incredible about halfway through.
- Cool with patience:
- Let them sit in the pan for 5 minutes (this is important—they need that time to set), then transfer to a wire rack to cool completely before glazing. Glazing warm muffins will make the glaze run off too fast.
- Make the glaze:
- Whisk powdered sugar with 1 tablespoon of milk, then add more milk a little at a time until you have a consistency that drizzles nicely but doesn't run like water. It should coat a spoon and fall in ribbons.
- Glaze and serve:
- Drizzle the glaze over the cooled muffins in whatever pattern feels right to you. Let it set for a few minutes before eating if you want it to firm up slightly.
 Pin it
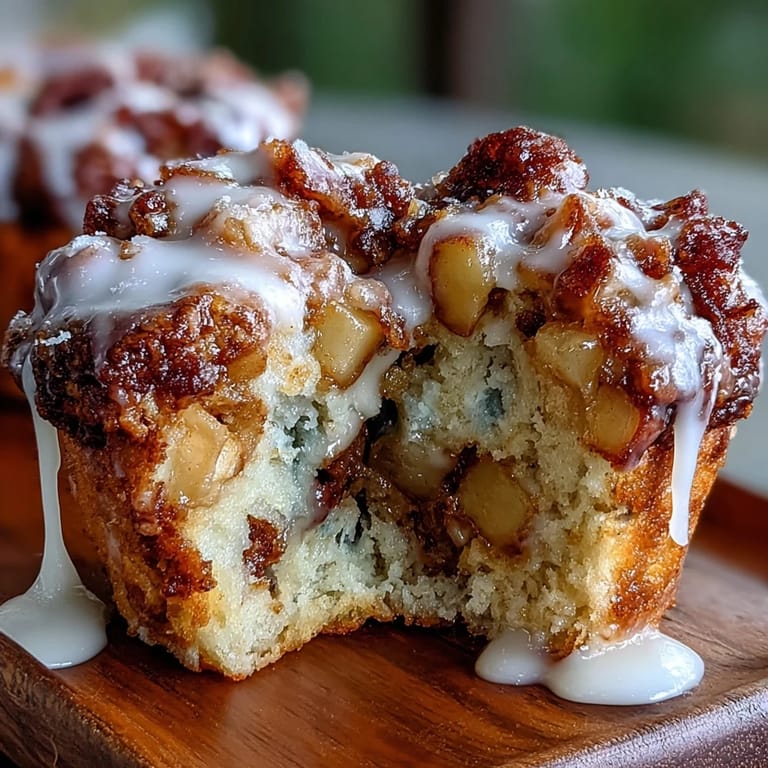
 There was one afternoon when I made these muffins for my daughter's school bake sale, and she came home proud because another kid had asked if our family owned a bakery. That moment made me realize this recipe had crossed over from being something I made to being something that represented a little bit of care and effort in the everyday kind of way that matters most.
Storage and Keeping Them Fresh
These muffins are genuinely better on day two when the flavors have had time to settle and the crumb becomes even more tender—they keep at room temperature in an airtight container for up to three days, which means you don't need to rush through them. If you want to keep them longer, wrap them individually in plastic wrap and freeze them; they'll thaw at room temperature in about an hour, and you can add the glaze after thawing so it looks fresh.
Ways to Make Them Your Own
This recipe is honestly flexible enough that you can make small changes without ruining anything. A pinch of nutmeg adds a subtle warmth that echoes the cinnamon, while chopped toasted walnuts or pecans stirred into the batter add a textural surprise that feels fancy but doesn't complicate the process. Some people swear by a tablespoon of brown butter in the wet ingredients for deeper flavor, and I'm not going to argue with that choice.
The Glaze and Final Touches
The powdered sugar glaze is really just a vehicle for sweetness and visual appeal, but it's the part that elevates these from homemade muffins to bakery-quality treats—it's worth taking the thirty seconds to do it right. If you're feeling indulgent, cream works beautifully instead of milk and adds richness, or you can thin the glaze with a tiny amount of apple cider vinegar for a subtle tartness that plays against the sweetness.
- Make the glaze right before serving so it looks fresh and glossy rather than dried and dull.
- If your glaze is too thick, whisk in milk one teaspoon at a time until it reaches the right consistency.
- These muffins are best within a few hours of glazing, so plan your timing accordingly if you're bringing them somewhere.
 Pin it
 These muffins have become my answer to the question of what to make when I want something that tastes homemade but doesn't demand too much of me. They've gotten me through mornings, potlucks, and moments when I needed to remember that good food doesn't have to be complicated to be worth making.
Frequently Asked Questions
- → What type of apples work best?
Granny Smith or Honeycrisp apples are ideal due to their firm texture and balanced tartness.
- → How can I prevent the muffins from drying out?
Avoid overmixing the batter and bake until just cooked through to keep them moist and tender.
- → Can I add nuts for extra texture?
Yes, chopped toasted walnuts or pecans can be folded in for added crunch.
- → Is it possible to make the glaze richer?
Substituting cream for milk in the glaze will create a richer, creamier finish.
- → How should I store these muffins to maintain freshness?
Keep them in an airtight container at room temperature for up to three days to preserve softness.