 Save
Save My coworker Mike brought one of these sandwiches to lunch last spring, and the smell alone stopped every conversation at the table. Golden chicken, melted cheese, that distinctive tomato-vodka aroma—I was sold before I even took a bite. Turns out, he'd been making them at home for years, perfecting the crispy exterior while keeping the inside impossibly tender. When he finally shared the technique, I realized this wasn't just Chicken Parmesan on bread; it was a complete textural experience that somehow felt both comforting and restaurant-worthy.
I made these for my sister's unexpected dinner party when she realized her planned entrée had fallen through, and watching people's faces as they bit through that crispy coating into warm, saucy chicken felt like a small kitchen victory. She texted me the next week asking for the recipe because her husband couldn't stop talking about it. Sometimes the best meals aren't the ones you planned obsessively over—they're the ones born from a little kitchen crisis and some decent technique.
Ingredients
- Boneless, skinless chicken breasts: Pound these to an even thickness so they cook uniformly and stay juicy through the frying process—uneven pieces mean some parts are overdone before others catch up.
- All-purpose flour: The first layer in your breading station; it helps the egg adhere properly and creates that initial seal.
- Large eggs, beaten: Your binding agent that makes the breadcrumbs stick like glue—don't skip this step or your coating will flake off in the oil.
- Breadcrumbs: Panko breadcrumbs give you extra crunch if you can find them, but regular ones work beautifully too.
- Italian seasoning: One teaspoon seasons the chicken itself before breading, building flavor from the inside out.
- Salt and pepper: Taste as you season; these season both the raw chicken and the breading mixture.
- Olive oil, for frying: You'll need about half an inch in your skillet—enough to get that golden, crispy exterior without deep frying.
- Vodka sauce: Store-bought works perfectly here; the vodka in the sauce adds a subtle depth that just plain marinara doesn't quite capture.
- Shredded mozzarella cheese: Fresh mozzarella will separate and become greasy; stick with the shredded kind for even melting.
- Italian or ciabatta bread: Sturdy enough to hold sauce and toppings without falling apart, with enough texture to stand up to the heat.
- Fresh basil leaves: A optional garnish that adds brightness; add it just before serving so it doesn't wilt into oblivion.
Tired of Takeout? 🥡
Get 10 meals you can make faster than delivery arrives. Seriously.
One email. No spam. Unsubscribe anytime.
Instructions
- Flatten your chicken to even thickness:
- Place each breast between plastic wrap or parchment and pound gently with a meat mallet until it's about half an inch thick all over. This prevents dry edges and rare centers.
- Season the chicken:
- Sprinkle salt, pepper, and Italian seasoning on both sides, pressing gently so it adheres to the surface.
- Build your breading station:
- Arrange three shallow bowls in a row: flour in the first, beaten eggs in the second, breadcrumbs in the third. This assembly-line approach keeps your hands relatively clean and makes the process smooth.
- Bread each piece:
- Coat the chicken in flour first, shaking off excess, then dip in egg until fully submerged, then press into breadcrumbs on both sides, gently pressing so they stick. The gentle pressure matters—aggressive pressing compacts the coating and makes it dense instead of crispy.
- Heat your oil:
- Pour about half an inch of olive oil into a large skillet and set it over medium heat, letting it get hot enough that a breadcrumb sizzles immediately when it hits the surface, but not so hot that it smokes.
- Fry the chicken:
- Carefully place each breast in the hot oil and listen for that immediate sizzle—it's the sound of a proper crust forming. Let it fry undisturbed for 5 to 7 minutes until the bottom is deep golden, then flip and fry the other side for another 5 to 7 minutes until cooked through.
- Drain on paper towels:
- Transfer the chicken to a paper towel-lined plate immediately; this stops the cooking process and removes excess oil.
- Warm your sauce gently:
- In a small saucepan over low heat, stir the vodka sauce occasionally just until it's warmed through, about 5 minutes. High heat can separate the cream.
- Toast your bread:
- A quick toast under a broiler or in a toaster oven gives the bread enough structure to support the wet toppings without becoming soggy.
- Build the sandwich:
- Place a warm fried chicken breast on a slice of toasted bread, spoon generous vodka sauce over top, then sprinkle mozzarella cheese on the sauce.
- Melt the cheese slightly:
- Cover loosely with foil or a lid for about a minute so the residual heat softens the cheese without fully melting it into a puddle.
- Garnish and close:
- If using fresh basil, tear a few leaves and scatter them over the cheese now, then top with the second slice of toasted bread.
- Serve immediately:
- The moment everything comes together is when the sandwich is at its absolute best—warm, crispy, saucy, and gooey all at once.
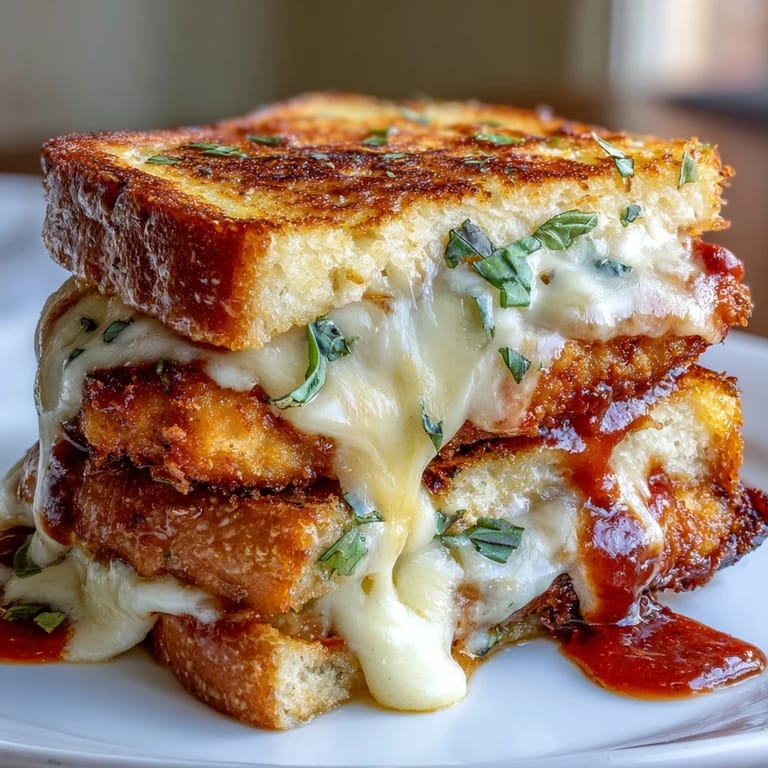
 Pin it
 My teenage nephew ate three of these at dinner one night and declared them better than his favorite restaurant version, which prompted an honest-to-God debate about whether homemade or restaurant food was superior. It reminded me that food isn't just fuel; it's a reason for people to sit down together and argue about something that doesn't matter but somehow feels important in that moment.
The Crispy Coating Secret
The magic of a perfect crust happens in those few seconds after the chicken hits the hot oil when the exterior seals and moisture transforms into steam that forces the breadcrumbs to crisp. I've learned that if your oil isn't hot enough, the breadcrumbs just absorb oil like a sponge and turn greasy instead of crunchy. Temperature is everything—aim for a gentle sizzle that's immediate and lively but not violent or smoking.
Why Vodka Sauce Makes the Difference
Plain marinara is fine, but vodka sauce adds a subtle warmth and roundness that regular tomato sauce can't quite achieve. The vodka itself cooks off, but it carries flavor compounds through the sauce in a way that makes people pause and ask what that element is they're tasting. It's not an obvious flavor, but it's the difference between a good sandwich and one people actually remember.
Building and Serving Like a Pro
Assembly is the final skill here, and it's about respecting the heat and moisture of each component. Everything should still be warm when you build it, the bread fresh from the toaster, the chicken just out of the pan, the sauce gently steaming. Rushing this step or letting things cool down means you end up with a soggy, lukewarm sandwich instead of the crispy-meets-creamy experience you worked for.
- Toast your bread right before assembly so it has structural integrity but hasn't cooled completely.
- If you're making these for a crowd, time the chicken frying so the last batch finishes just as you're plating the first sandwiches.
- Melting the cheese happens faster than you think; use foil to trap heat but don't overdo it or the mozzarella splits into grease.
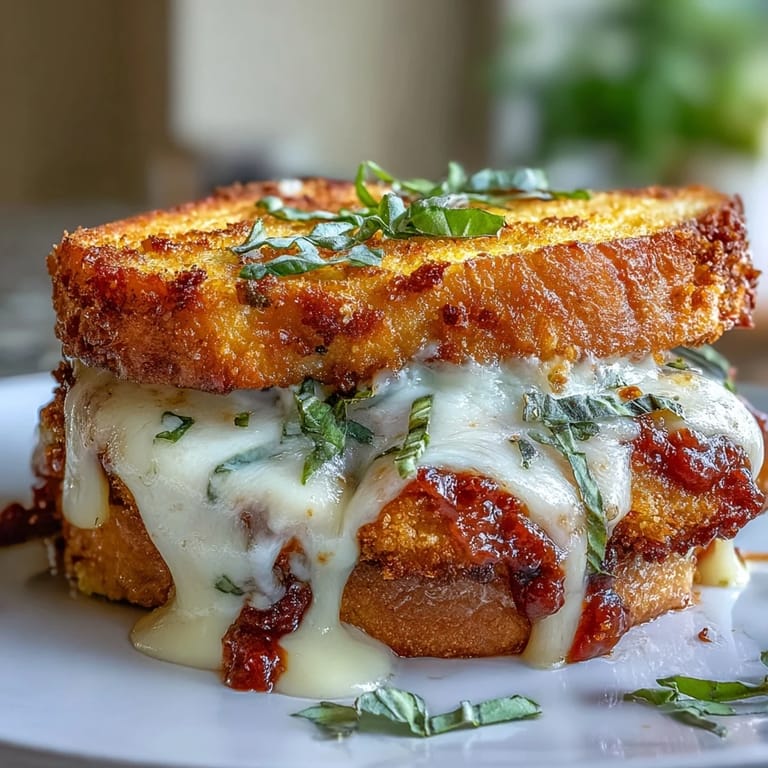
 Pin it
 This sandwich somehow manages to feel both indulgent and achievable, the kind of meal that makes you feel capable in the kitchen without requiring anything fancy or obscure. Make it once and you'll understand why people keep coming back for it.