 Save
Save Last December my sister sent me home from our family Christmas party with a container of toffee bits and a challenge to bake something better than the cookies I'd brought that year. The house still smelled like cinnamon when I started mixing this cake at midnight, flour dusting my pajamas and the kitchen island covered in mixing bowls.
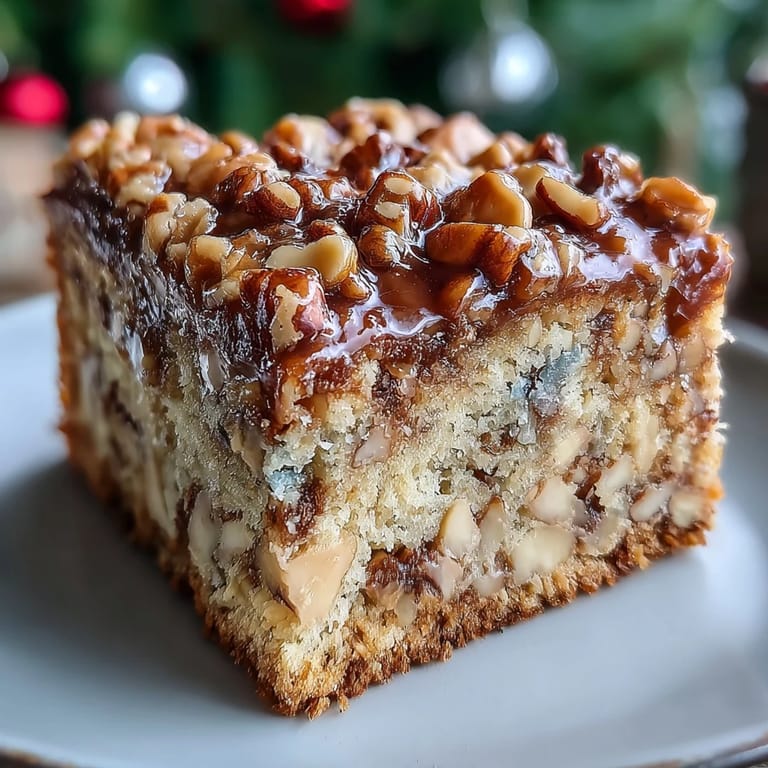
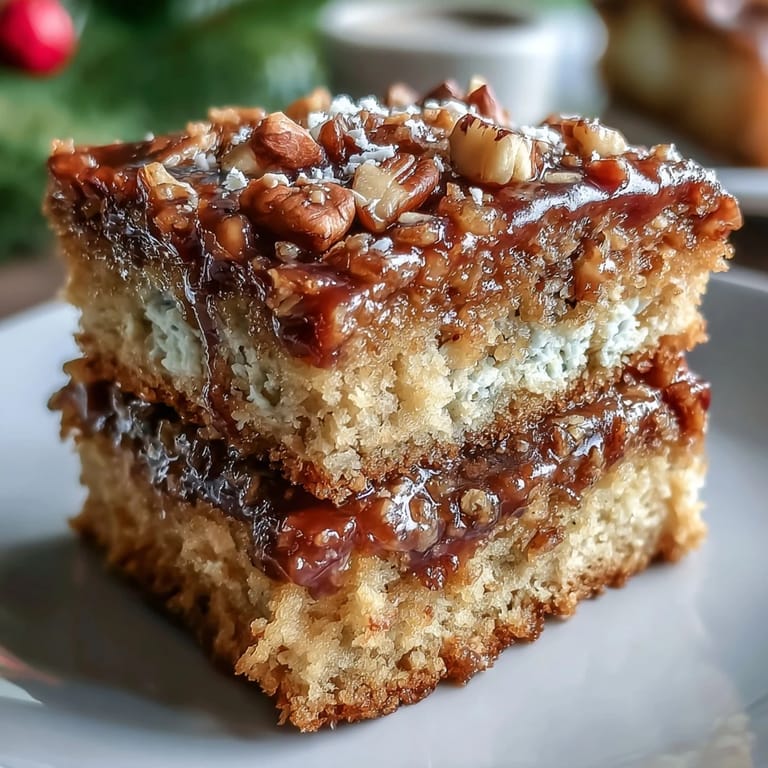
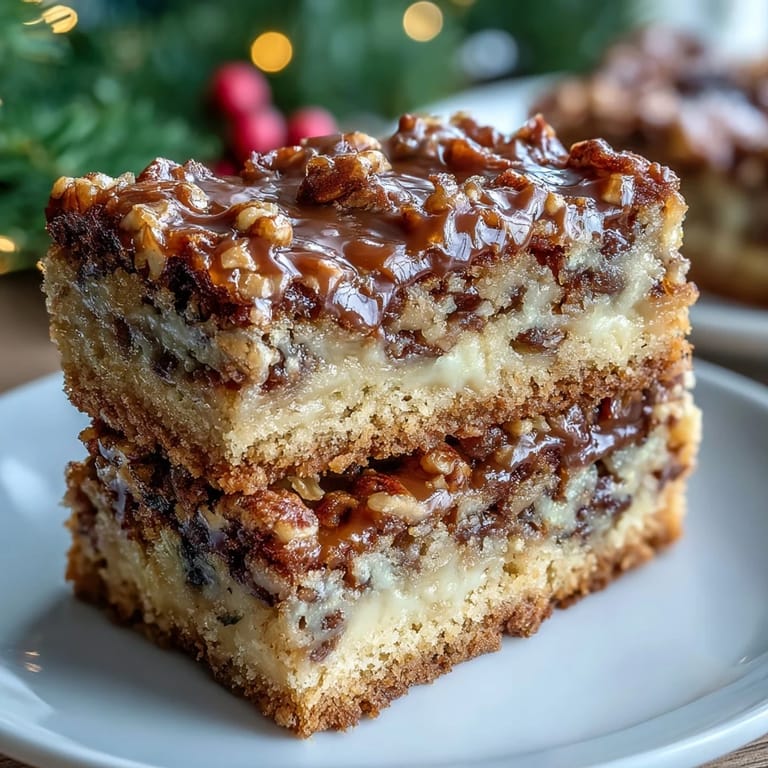
I brought this cake to my office potluck the next week and watched my normally reserved supervisor take three slices before asking for the recipe. The way the toffee bits melt into little pockets of buttery sweetness while the nuts stay perfectly crisp is something people immediately understand without needing an explanation.
Ingredients
- All-purpose flour: Creates the tender crumb structure though any reliable gluten-free blend works beautifully here
- Baking powder: Essential lift that keeps the cake from becoming dense under all those toffee bits
- Salt: Balances the sweetness and intensifies all the buttery toffee flavors
- Unsalted butter: Room temperature butter is non-negotiable for achieving that perfectly fluffy creamed base
- Sugar: Creams with the butter to create air pockets that make each slice impossibly light
- Eggs: Room temperature eggs incorporate better creating a more stable crumb structure
- Vanilla extract: Pure extract makes a noticeable difference in the warm aromatic background notes
- Toffee bits: These melt slightly during baking creating those irresistible ribbons of caramel throughout the cake
- Chopped pecans or walnuts: Toast naturally in the oven adding essential crunch and nutty depth
Tired of Takeout? 🥡
Get 10 meals you can make faster than delivery arrives. Seriously.
One email. No spam. Unsubscribe anytime.
Instructions
- Get everything ready first:
- Pull your butter and eggs out of the fridge at least an hour before starting and measure all ingredients into separate bowls so you can work smoothly once mixing begins
- Prep your oven and pans:
- Set your oven to 350°F and generously butter and flour two round cake pans tapping out any excess flour
- Build the butter base:
- Cream your softened butter and sugar together for a full four minutes until the mixture looks pale and almost silky stopping to scrape the bowl down halfway through
- Add the eggs one by one:
- Drop each egg in separately letting it completely incorporate before adding the next then mix in your vanilla until everything looks glossy and smooth
- Combine the dry mixture:
- Whisk the flour baking powder and salt in a separate bowl ensuring the baking powder gets evenly distributed throughout the flour
- Bring it all together:
- Pour the dry ingredients into your butter mixture in three additions mixing on low just until the flour streaks disappear
- Fold in the good stuff:
- Sprinkle in the toffee bits and chopped nuts folding gently by hand until everything is evenly distributed without deflating all that air you just worked to create
- Bake to golden perfection:
- Divide the batter between your pans and bake for 25 to 30 minutes until a tester comes out with just a few moist crumbs attached
- The waiting game:
- Let the layers cool in their pans for exactly ten minutes then turn them out onto wire racks leaving them alone until completely cool before you even think about frosting
 Pin it
 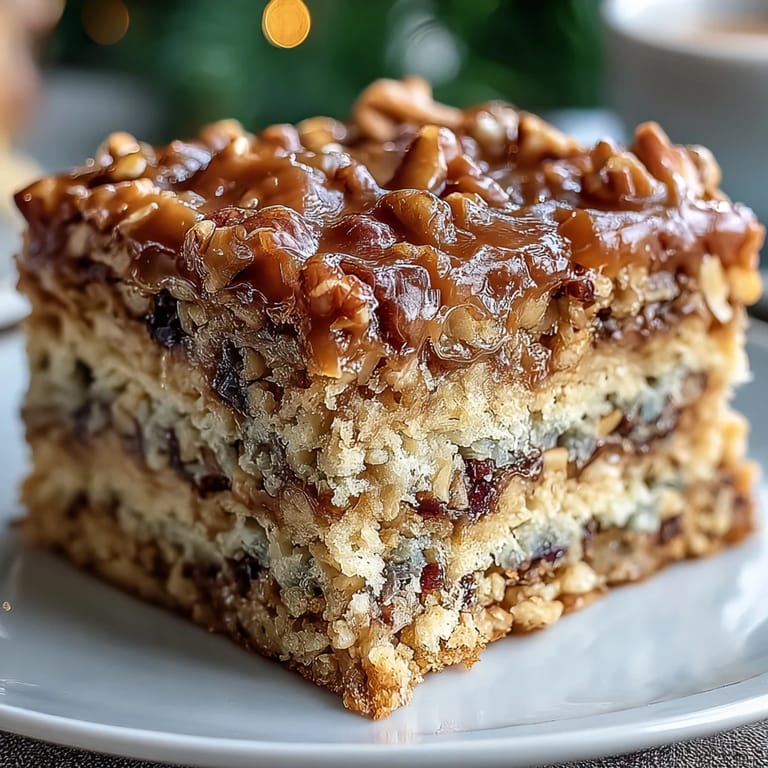 Pin it
 My nephew who claims to hate anything with nuts in it picked every single walnut out of this cake one year only to ask me the next Christmas why my cake was missing something. Now I make a small nut-free version alongside the regular one and watch everyone happily gravitate toward their preference without any fuss.
Make Ahead Magic
The baked layers freeze exceptionally well wrapped tightly in plastic then foil for up to three months. I actually prefer baking this cake a week before Christmas and letting the flavors meld in the freezer then thawing it overnight before frosting the day of the party.
Frosting Options
While this cake stands up beautifully on its own I've taken to pairing it with either a salted caramel buttercream that echoes those toffee bits or a tangy cream cheese frosting that cuts through all that richness perfectly.
Serving Suggestions
A slightly warm slice with a cup of strong coffee or hot spiced cider is my favorite way to serve this especially after coming in from the cold. The contrast between the warm toffee ribbons and cold crunch of the nuts creates this incredible texture experience that keeps people coming back for just one more sliver.
- Dust the top with powdered sugar right before serving for an elegant snow-dusted look
- Serve with a small scoop of vanilla ice cream to balance the richness
- This cake actually improves on day two as the toffee softens further into the crumb
 Pin it
 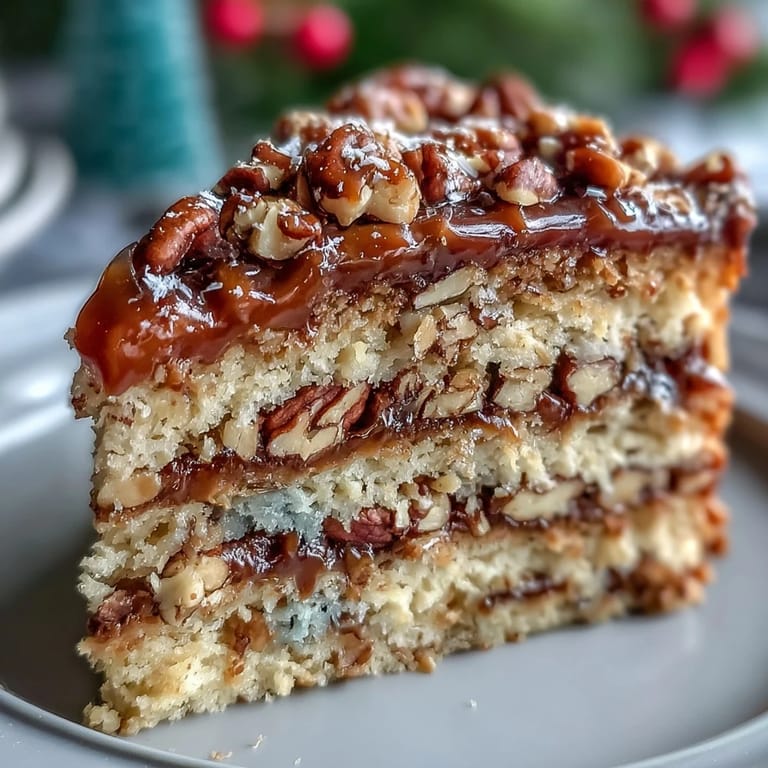 Pin it
 There is something genuinely special about watching people's faces light up when they hit that first pocket of melted toffee in their slice. This cake has become the one request I get every single December without fail.
Frequently Asked Questions
- → Can I make this cake ahead of time?
Yes, bake layers up to 2 days ahead. Wrap tightly and store at room temperature. Frost before serving for best texture.
- → What nuts work best in this cake?
Pecans and walnuts both provide excellent flavor and crunch. Choose based on preference or what you have available.
- → How do I know when the cake is done?
Insert a toothpick into the center—it should come out clean or with just a few moist crumbs, not wet batter.
- → Can I freeze the cake layers?
Absolutely. Wrap cooled layers well in plastic and freeze for up to 3 months. Thaw overnight before frosting.
- → What frosting pairs well with this?
Caramel buttercream or cream cheese frosting complement the toffee beautifully. Vanilla buttercream works too for simpler sweetness.
- → How do I make it vegan?
Use vegan butter and replace eggs with flax eggs or unsweetened applesauce. Check that your toffee bits are dairy-free.